Economic efficiency of density measurement methods in additive manufacturing
Additive manufacturing has established itself as a transformative technology in the manufacturing industry. A crucial aspect for the quality and...
5 min read
Mathias Evers : 30.05.2024

Determining the density of materials is an important aspect of materials science and manufacturing technology. Various methods are available, each of which has its own advantages and disadvantages. In this article, which draws on the findings of a study by the Fraunhofer Institute, we focus on the defect detection capabilities of each method.
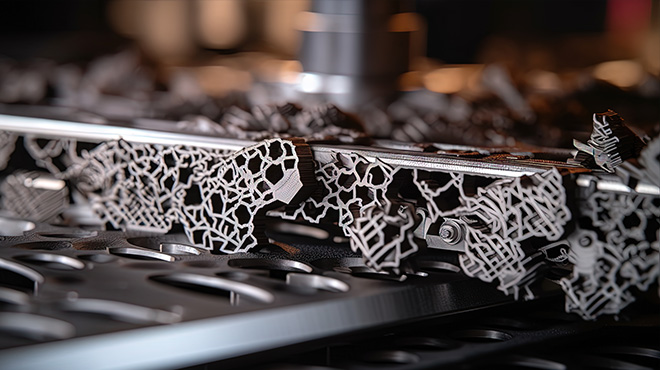
Additive manufacturing (AM) has made considerable progress in recent years, particularly in the field of selective laser sintering (SLS) and selective laser melting (SLM). However, as with any manufacturing method, defects can also occur in additively manufactured components. These errors can affect the quality and functionality of the end product. It is therefore important to identify and classify these defects.
Pores:
Pores are small, often microscopic cavities or gaps within a material. In relation to additive manufacturing, particularly in SLS and SLM processes, pores refer to the unfused areas or voids that can form in the component during the manufacturing process. The formation of voids in an AM process can be influenced by various factors. If the powder material is not completely fused by the laser during the process, so-called lack of fusion pores can form. This can be caused by insufficient laser energy or a scanning speed that is too fast. Another reason is thermal stress. During the manufacturing process, the material is repeatedly heated and cooled. These temperature fluctuations can lead to thermal stresses, which can contribute to the formation of pores. Gas pores, on the other hand, are caused by excessive energy input, which causes parts of the material to vaporise and thus trap gas.
Powder quality is also a decisive factor in the formation of pores in additively manufactured components. The quality and consistency of the powder used plays a decisive role. If the powder contains impurities or the particle size is not uniform, this can lead to uneven fusion and thus to the formation of pores.
Deformations:
Deformation refers to unwanted deviations from the originally intended geometry of a component. This can manifest itself in the form of warping, shrinkage or expansion. In SLS and SLM processes, such deformations can be caused by various factors during the manufacturing process. Temperature differences during sintering can cause the components to warp. Deformation and pore formation are often linked, as both are favoured by similar process parameters and conditions.
For example, thermal stresses can not only be conducive to pore formation, but often cause stresses that lead to unwanted deformations. This behaviour can also be observed with insufficient fusion of the starting material.
However, the cooling rate is also decisive for the formation of deformation defects. Cooling the material too quickly can lead to uneven shrinkage behaviour, which causes deformation. This uneven cooling can also cause pores, as areas of the material can shrink differently and separate from each other.
Deformation and pore formation in SLS-manufactured AM components are closely linked and can significantly affect the quality and performance of the final product.
Cracks:
Cracks are breaks or separations in a material that are often caused by mechanical or thermal stresses. These can be caused by stresses in the material during cooling. In SLS and SLM processes, cracks can be a serious quality issue as they can affect the mechanical properties and integrity of the component.
Thermal stresses and insufficient fusion are also the main causes of cracking. The resulting material defects in particular favour the formation of cracks. Impurities or defects in the starting material can act as nucleation sites for cracks. These cracks can propagate during the process or only when the components are later used, especially if they are exposed to thermal or mechanical stresses.
In rare cases, overheating can favour the formation of cracks. If the laser is directed at a certain area of the powder for too long, this can lead to overheating. This can lead to a change in the microstructure of the material and cause cracks..
Defects in SLS-manufactured AM components can significantly affect the quality and performance of the end product. It is therefore important to carefully monitor and control the process to minimise their formation. Process control in manufacturing can be achieved through the use of density determination, as density provides information about the mechanical properties of a component.
Archimedes manually:
This method measures the density of the component by weighing it in two different fluids. Pores and other defects can influence the density, i.e. a deviation from the theoretical density can provide information about the porosity of a component. However, specific statements about the location and type of defect cannot be made. The Archimedean method is considered to be one of the most accurate for determining density, but is highly dependent on the design. Human influence can lead to inaccurate results and therefore incorrect conclusions for production.
CT-Scans:
X-rays can be used to visualise internal structures of the component, which is particularly useful for identifying internal defects. The use of a CT device provides a very good insight into the ‘inside’ of the component. Defects can be recognised and conclusions drawn about the manufacturing process. The main disadvantages of this method are the costs and the time required. As the process requires sophisticated analyses and evaluations, trained personnel are needed who can process and evaluate the information reliably. From an economic point of view, this lengthy process is not ideal for production support, but is more suitable for detailed analyses / parameter studies of new materials and alloys. In addition, the limited resolution means that micro-defects and the smallest pores cannot be detected.
Micrograph analysis:
Micrographs are standard in many industries, as they provide information about the condition and properties of a component at a microscopic level. For this purpose, the component is cut through and prepared. The object is examined under a microscope in order to analyse and record the microstructure and any defects. The advantages with regard to AM lie in the precise examination of the section, which can be viewed with maximum accuracy. However, this is also the biggest problem with the method. It is only a section and therefore statements about the properties of the component can only be made for this area. It can never be ruled out that you have just caught a particularly good or bad spot in the component.
Archimedes automated according to Dimensionics Density:
This is an automated process that works in a similar way to the manual Archimedes method, but delivers more precise and consistent results. The advantage lies in the possibility of obtaining reproducible and traceable density values of a component directly in the production environment.
This method is the most economically effective alternative for process monitoring. Processes can be checked and approved. As with the manual variant, the same applies here: The result shows whether construction errors have occurred, but does not provide any information about the type and number of errors. Accompanying procedures can be used for further analysis..
Additive manufacturing, in particular selective laser sintering (SLS), has the potential to produce high-precision components. However, various defects such as pores, deformations and cracks can occur during the manufacturing process, affecting the quality and performance of the final product. These defects are caused by various factors, including thermal stresses, insufficient fusion of the powder and the quality of the powder used. To ensure the quality and integrity of SLS-manufactured components, it is important to identify and classify these defects. Various measurement methods are available for this purpose, including the manual and automated Archimedes method, CT scans and micrograph analysis. Each of these methods has its own advantages and disadvantages in terms of accuracy, cost, time required and the amount of information provided. A careful selection and combination of these methods can help manufacturers to optimise the manufacturing process and produce high-quality components.
Source: Analysis of measurement methods for density determination - Fraunhofer IAPT - Dimensionics Density GmbH

Additive manufacturing has established itself as a transformative technology in the manufacturing industry. A crucial aspect for the quality and...

1 min read
What awaits you here: Introduction The Archimedes method Automated density determination Computertomography (CT) Micrograph Pycnometer Conclusion ...

What awaits you here: INTRODUCTION MICROGRAPH COMPUTERTOMOGRAPHY (CT) AUTOMATED DENSITY DETERMINATION CONCLUSION Introduction In additive...